
Homebrewのインストール方法
※本ページはプロモーションが含まれています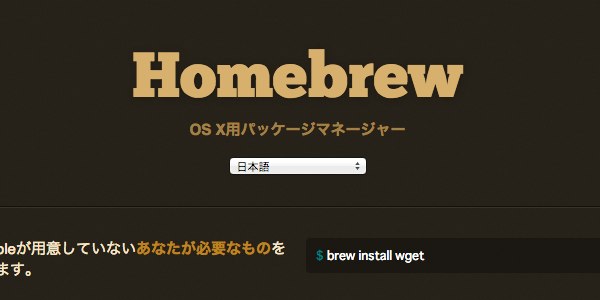
Mac用のパッケージマネージャーのHomebrew。
MacPortsの後釜として人気になってきているようです。ひとつのMacにMacPortsとHomebrew両方入れるのはよろしくないようなので、Homebrewを使用する際はMacPortsをアンインストールしてから行いましょう。
こちらの記事も要チェック!
Xocdeのインストール
HomebrewにはXcodeが必要なので、インストールしていない人は「第2回 iPhoneアプリ作成に必要なツールを導入|ドットインストールでiPhoneアプリ作成を勉強」でインストール方法を紹介しているので参考に。
Homebrewのインストール
ターミナルを開き、下記コマンドを実行。
$ ruby -e "$(curl -fsSL https://raw.githubusercontent.com/Homebrew/install/master/install)"
インストール中に
Press RETURN to continue or any other key to abort
と聞かれたらキーボードの「return」キーを押す。
Password:
と聞かれたらパソコンのパスワードを入力して「return」キーを押す。
brewを最新バージョンにする
$ brew update
以上で完了。
動作チェック
チャント動作しているかチェック。
$ brew doctor
すると3つほどエラーが出てたので修正。
1つ目のエラー
Warning: Unbrewed dylibs were found in /usr/local/lib.
If you didn't put them there on purpose they could cause problems when
building Homebrew formulae, and may need to be deleted.

Unexpected dylibs:
    /usr/local/lib/JPKIPKCS11.dylib
    /usr/local/lib/JPKIServiceAPI.dylib
    /usr/local/lib/libusb-0.1.4.4.4.dylib
    /usr/local/lib/libusbpp-0.1.4.4.4.dylib
予期せないdylibsがあるので下記のように一つづつ削除
$ rm -rf /usr/local/lib/JPKIPKCS11.dylib
$ rm -rf /usr/local/lib/JPKIServiceAPI.dylib
$ rm -rf /usr/local/lib/libusb-0.1.4.4.4.dylib
$ rm -rf /usr/local/lib/libusbpp-0.1.4.4.4.dylib
2つ目のエラー
Warning: Unbrewed header files were found in /usr/local/include.
If you didn't put them there on purpose they could cause problems when
building Homebrew formulae, and may need to be deleted.

Unexpected header files:
    /usr/local/include/usb.h
    /usr/local/include/usbpp.h
もう一つ同じエラーが出ているので同様に削除
$ rm -rf /usr/local/include/usb.h
$ rm -rf /usr/local/include/usbpp.h
3つ目のエラー
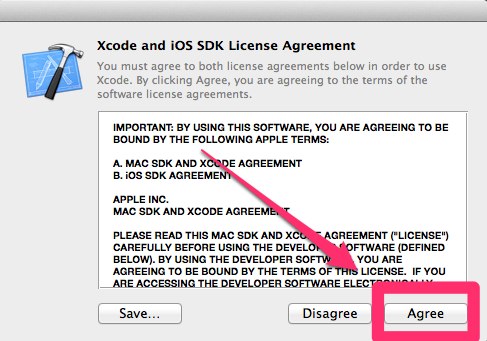
Warning: You have not agreed to the Xcode license.
Builds will fail! Agree to the license by opening Xcode.app or running:
    xcodebuild -license
Xcodeのライセンス同意がされていない。Xcode.appを立ち上げると同意画面が出るので「Agree」をクリック。パソコンのパスワードを求められるのでパスワードを入力して完了。
再度チェック
再度チェック
$ brew doctor
Warning: Broken symlinks were found. Remove them with `brew prune`:
上記エラーが出ていたので、
$ brew prune
を実行。
再度チェックすると
$ brew doctor
Your system is ready to brew.
このように表示されインストール完了。
HomebrewとMacPortの違い
HomebrewとMacPortの違いとして
・Homebrewは既存のソフトを使うのに対し、MacPortは新しくインストールする。
・Homebrewば一般ユーザとしてインストールできるのに対しMacPortはスーバーユーザ。
・インストールディレクトリはHomebrewは「/usr/local」MacPortは「/opt/user」
などの違いがある。
おわりに
Homebrewが主流になりつつあるようなのでMacPortからHomebrewに変えました。
これから勉強していきます。
 サーバー構築からブログ運営・マネタイズまで 1人で完結しているオールインワンブロガー。経験したり学んだ事を発信し続けていたらブログで生活できるようになりました。自分の能力(ちから)で生きていくを信念に、ストレス無く自分の人生を楽しむことをに全力を注いでいます。
 男も脱毛しないと恥ずかしい時代到来…!!
 快適な作業環境を求めて!